
Introduction
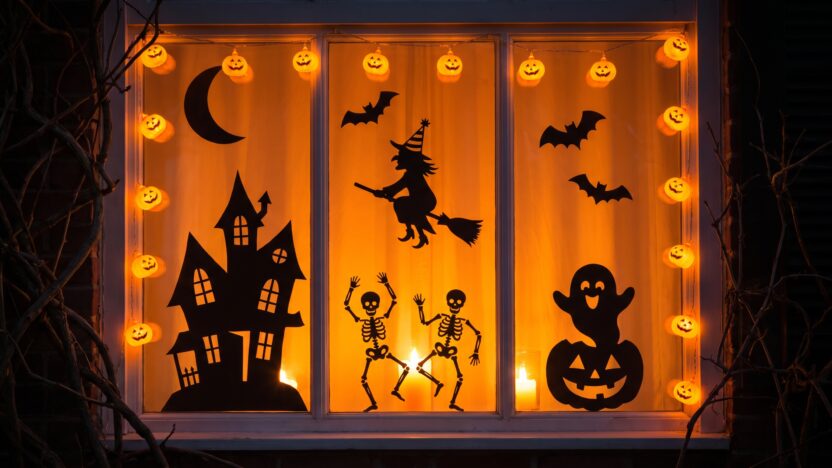
Halloween Window Silhouettes Decor Ideas can turn an ordinary window into the most eye-catching part of your home after dark. Picture a warmly lit room behind a black cat perched on the sill, a crooked witch floating across the glass, or tiny bats appearing to fly through an upstairs window.
The best part is that you don’t need elaborate decorations or a huge budget to create that effect. Window silhouettes work because they rely on shape, contrast, and lighting rather than lots of physical decor. They’re especially useful for renters, small homes, and anyone who wants Halloween decorating that looks dramatic from the street without taking over the living space.
For this roundup, we’re focusing on ideas that are playful enough for families but still have that wonderfully eerie Halloween atmosphere.
Key Takeaways
- Black silhouettes and warm backlighting create strong contrast after sunset.
- Use the size and shape of each window to determine how large your design should be.
- Cardstock, poster board, removable film, and similar lightweight materials can create impressive effects on a budget.
- Keep silhouettes visually simple; recognizable shapes usually read better from a distance.
- Mix spooky figures with playful details so the display feels festive rather than frightening.
Choosing the Right Window Silhouette
Before cutting anything, take a quick look at the window you want to decorate during both daytime and nighttime.
A silhouette that looks perfectly sized in daylight can disappear visually once the room is illuminated. Dark shapes need enough open space around them to remain recognizable. Windows facing the street are particularly good candidates because the contrast between a dark figure and a glowing interior naturally draws attention.
For the strongest effect, think of the window as a small stage. The glass is the backdrop, the silhouette is the actor, and the interior light provides the spotlight.
If you’re decorating several windows, don’t feel obligated to make them identical. A coordinated collection often looks more interesting when each window tells a slightly different Halloween story.
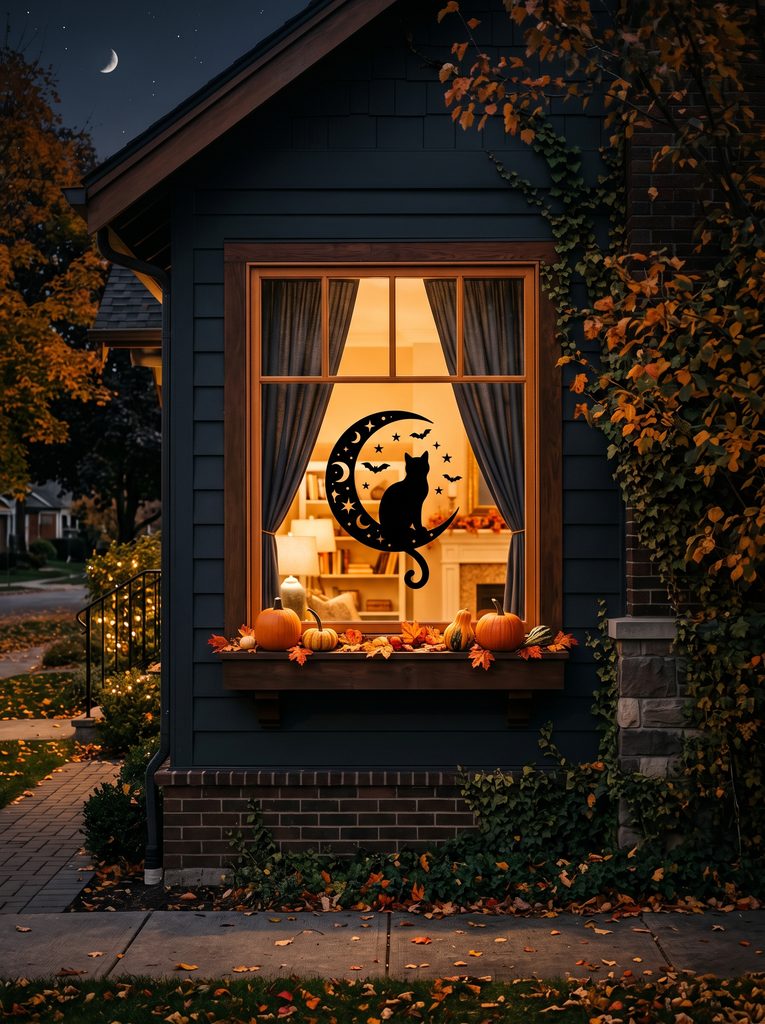
Creepy Cat Window
Short Decor Introduction
A mysterious cat silhouette is one of those Halloween decorations that instantly communicates the season without feeling overly scary. The pointed ears, curved tail, and glowing backdrop create a graphic look that works beautifully in living rooms, bedrooms, or front-facing windows. It also pairs naturally with pumpkins and autumn foliage, making it easy to blend into existing seasonal decor.
How to Get the Look
- Cut a large black cat profile from sturdy black poster board or lightweight craft board.
- Position the cat slightly off-center so the design feels more natural than a perfectly symmetrical display.
- Add a simple crescent moon behind it if the window has enough open space.
- Turn on a warm indoor lamp behind the silhouette after dark.
- Keep the window sill relatively uncluttered so the main shape remains easy to see.
- Add two or three small pumpkins below the window for a subtle connection between the indoor and outdoor displays.
Styling Tips
- A curved tail and pointed ears make the cat recognizable even when viewed from across the street.
- Leave some clear glass around the silhouette rather than filling every inch.
- For a softer family-friendly look, use pumpkins and amber lighting instead of harsh colored lights.
Design insight: Simple silhouettes often have more visual impact than complicated cutouts because the eye can recognize their outline almost instantly.
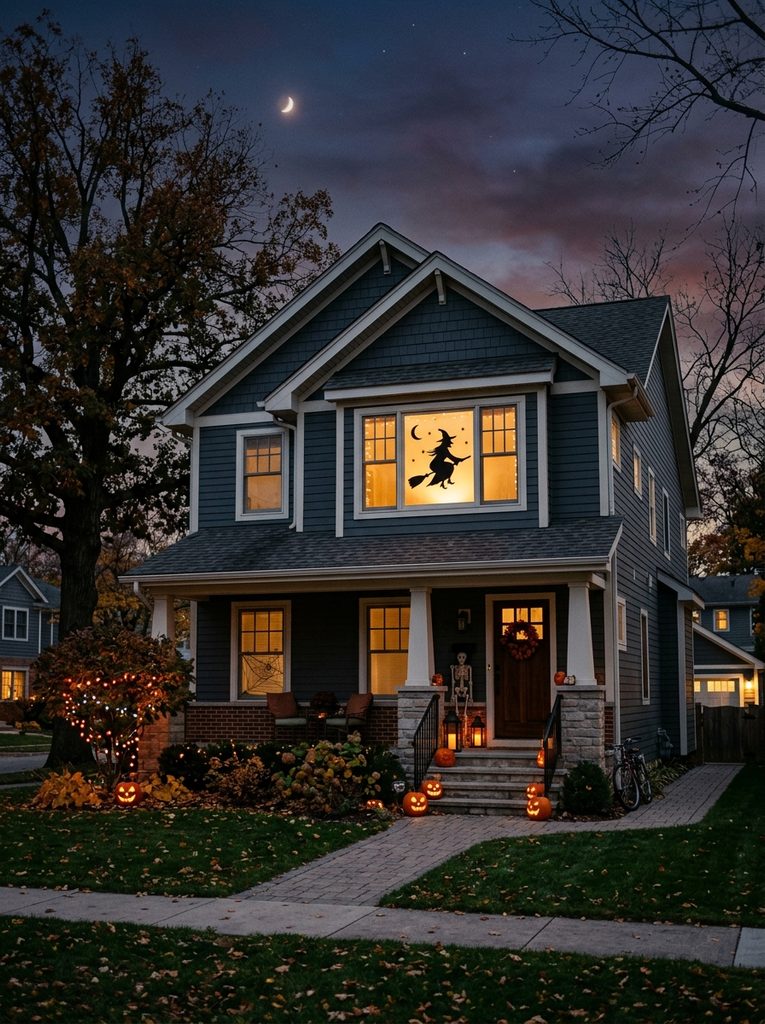
Flying Witch Silhouette
Short Decor Introduction
For a more theatrical display, a flying witch can make a single window feel like a tiny Halloween scene. Instead of placing the figure directly in the center, let her appear to be crossing the window, almost as though she has just flown past the house. This works particularly well on tall windows where the horizontal movement of the broom can balance the vertical shape.
How to Get the Look
- Choose a simple side-profile witch with a clearly defined hat and broom.
- Scale the design so the broom doesn’t extend awkwardly beyond the main window frame.
- Mount the silhouette on the inside of the glass using removable, window-safe methods appropriate for your surface.
- Use warm white or soft amber lighting behind the window.
- Add a few small bats around the witch rather than surrounding her with dozens of shapes.
- If decorating an upper-floor window, repeat one or two smaller motifs on another window below to visually connect the display.
Styling Tips
- A witch silhouette looks especially striking against warm yellow or amber light.
- Keep the figure mostly black; too many colored elements can weaken the classic silhouette effect.
- On a narrow window, rotate the composition slightly so the broom follows the longer horizontal dimension.
For a playful version, choose a witch with an oversized hat and flowing cape. For a moodier home exterior, use a more streamlined profile with a few tiny bats in the background.
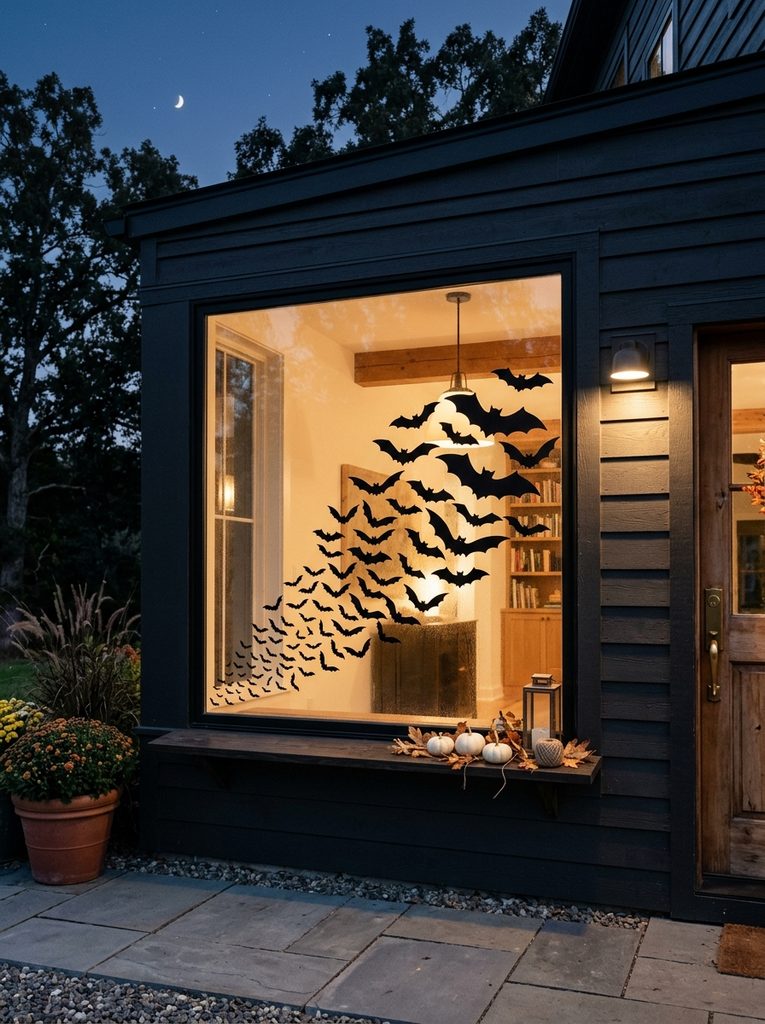
Bat Swarm Window
Short Decor Introduction
A swarm of bats gives you a completely different look because the decoration becomes a moving pattern rather than one large character. Start with tiny bats near one corner and gradually increase their size as they cross the glass. The result feels playful and slightly mysterious, while the scattered arrangement works especially well on wide windows and glass doors.
How to Get the Look
- Cut bats in several sizes rather than making every shape identical.
- Begin with the smallest bats near the outer edge of the window.
- Gradually increase their size toward the center to create a sense of movement.
- Keep the silhouettes black for maximum contrast against the illuminated room.
- Use removable adhesive designed for the window surface if you’re attaching pieces directly to the glass.
- Leave enough space between individual bats so the grouping doesn’t become one dark mass.
- Repeat a few bats on an adjacent window for a connected display.
Styling Tips
- Follow the natural shape of the window instead of forcing the bats into a straight line.
- A loose diagonal arrangement creates more movement than a rigid grid.
- If the room behind the window is already visually busy, use fewer bats and larger gaps.
Budget idea: This is one of the easiest designs to make from leftover black cardstock. You can create several different sizes from a single sheet and reuse the basic shapes year after year.
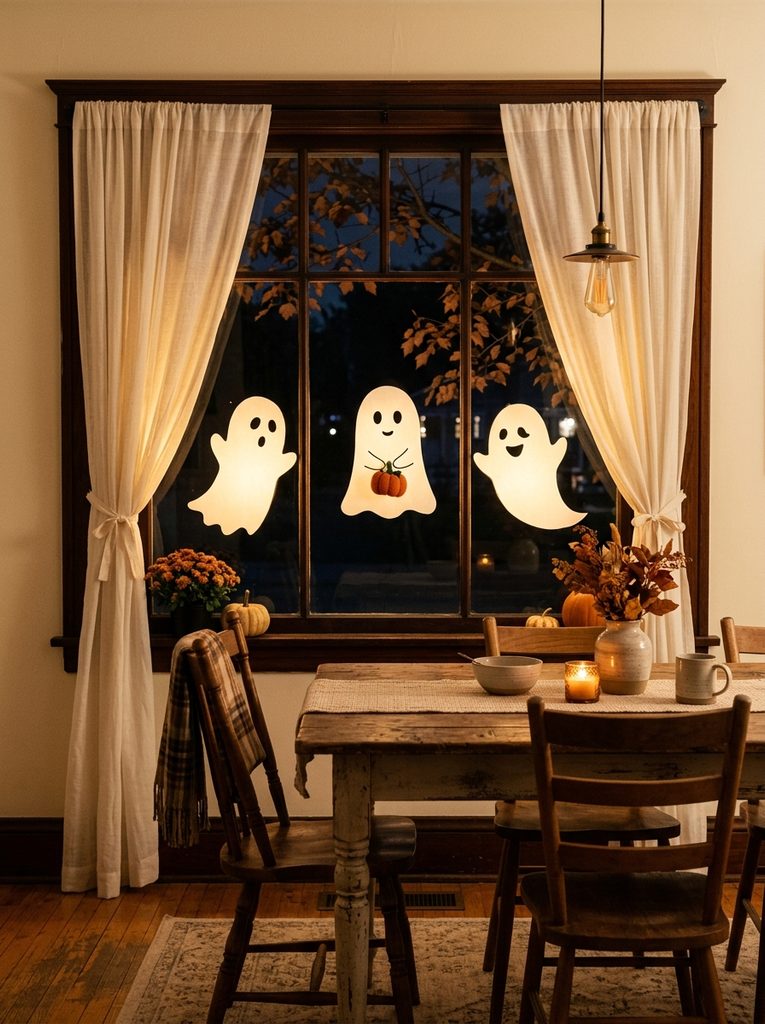
Ghostly Family Scene
Short Decor Introduction
Give your window a little personality with a group of friendly ghosts instead of one frightening figure. Vary their heights and expressions to create the feeling of a tiny ghostly family floating across the glass. This idea works beautifully in dining rooms, children’s rooms, or front windows where you want Halloween decor to feel cheerful and welcoming.
How to Get the Look
- Cut three or four ghost shapes in different sizes from lightweight white or pale material.
- Give each ghost a slightly different silhouette so they don’t look like identical cutouts.
- Place the largest figure toward the center and smaller ones around it.
- Use warm white lighting behind the window to create a soft glow.
- Add tiny black eyes or simple facial details if desired.
- Place a few miniature pumpkins on the interior sill beneath the display.
- Keep surrounding window decor minimal so the ghosts remain the focal point.
Styling Tips
- Use different heights to create depth and movement.
- Keep facial expressions simple for a charming rather than scary appearance.
- For children’s spaces, rounded ghost shapes tend to feel friendlier than sharp or exaggerated designs.
Design insight: A group of related silhouettes can tell a visual story without requiring much physical decoration, which makes this approach especially useful in small rooms.
Haunted House Window
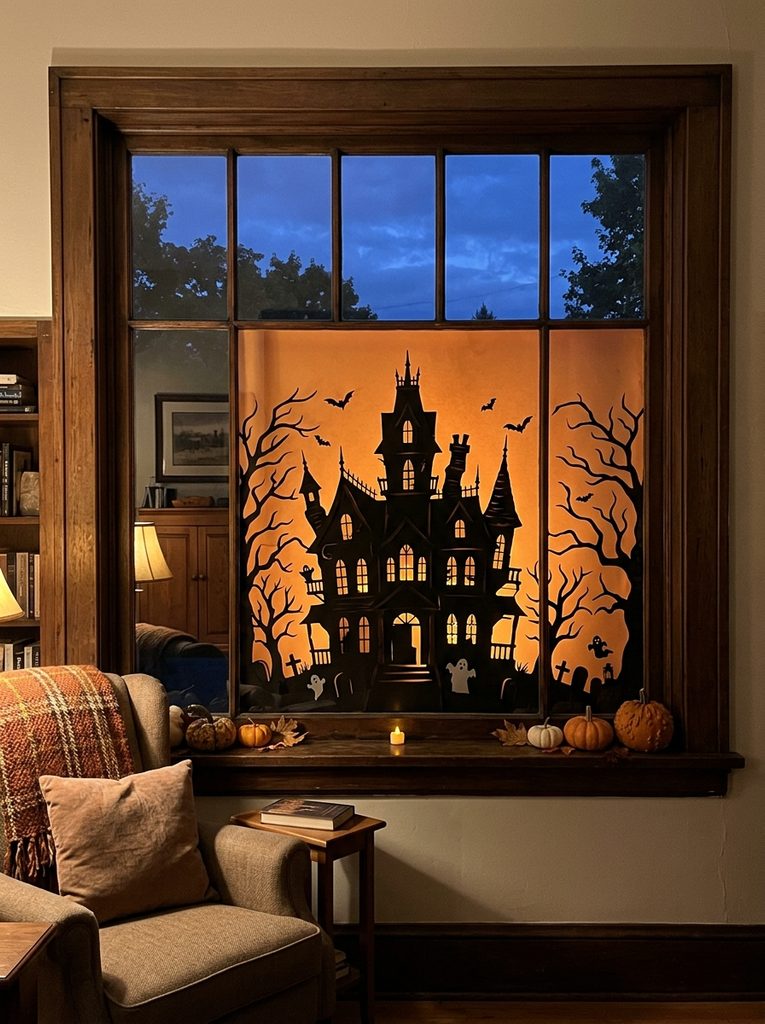
Short Decor Introduction
Turn the entire window into a miniature haunted landscape with a crooked house, bare trees, and a few flying bats. This composition feels more immersive than a single character because the viewer discovers several details at once. It’s particularly effective on a wide picture window where you have enough horizontal space to create a complete little Halloween scene.
How to Get the Look
- Start with a simple haunted-house outline featuring uneven rooflines and narrow windows.
- Add two or three bare tree silhouettes along the sides.
- Place a handful of bats above the roof to suggest movement.
- Use warm orange or amber light behind the entire composition.
- Keep the bottom of the silhouette visually grounded along the window sill.
- Add a few real pumpkins outside if you want the scene to transition naturally from window to porch.
- Avoid cutting overly intricate details that may disappear at night.
Styling Tips
- Use the house as the largest shape and treat trees and bats as supporting details.
- A slightly asymmetrical composition feels more naturally eerie.
- If your window is narrow, simplify the scene to a house and one tree rather than squeezing everything together.
For a more sophisticated exterior, combine black silhouettes with warm white lighting rather than bright orange bulbs. The contrast feels atmospheric without becoming overly theatrical.
Spiderweb and Spider Silhouette
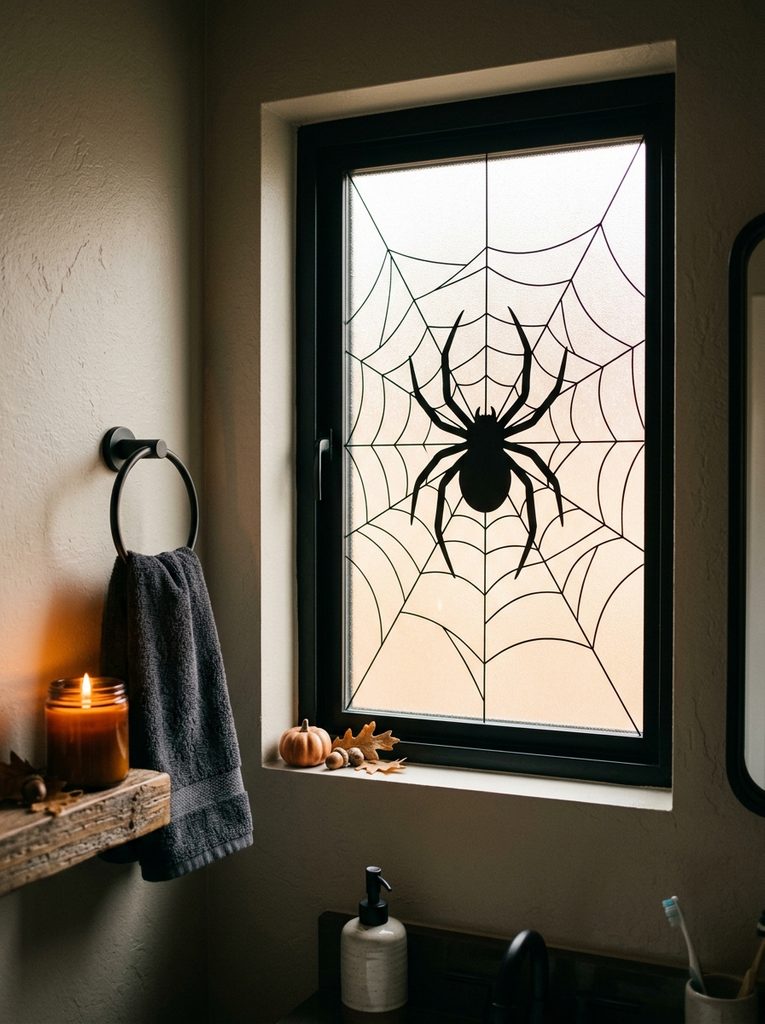
Short Decor Introduction
For a smaller window, you don’t need a complicated scene. A large spider surrounded by a simple web can create plenty of Halloween character while using very little material. The strong geometric pattern also suits modern interiors because it relies on clean lines and a limited black-and-neutral palette rather than lots of colorful decorations.
How to Get the Look
- Choose one large spider silhouette as the main focal point.
- Create a simple web with broad lines that remain visible from a distance.
- Position the spider slightly away from the center for a more natural appearance.
- Use black against a softly illuminated or lightly frosted window.
- Keep nearby bathroom or utility-room decor neutral.
- If using a real web material, secure it carefully and keep it away from heat sources and fixtures.
- Remove the display easily after Halloween so the window can return to its everyday function.
Styling Tips
- A large spider usually looks better than several tiny ones on a small window.
- Keep web lines relatively bold; extremely fine details can disappear in low light.
- Pair the black silhouette with warm beige, cream, or amber tones to prevent the room from feeling too stark.
Small-space solution: This design is ideal for apartment windows, bathroom glass, narrow sidelights, or any spot where a larger Halloween scene would feel crowded.
Skeleton Window Portrait
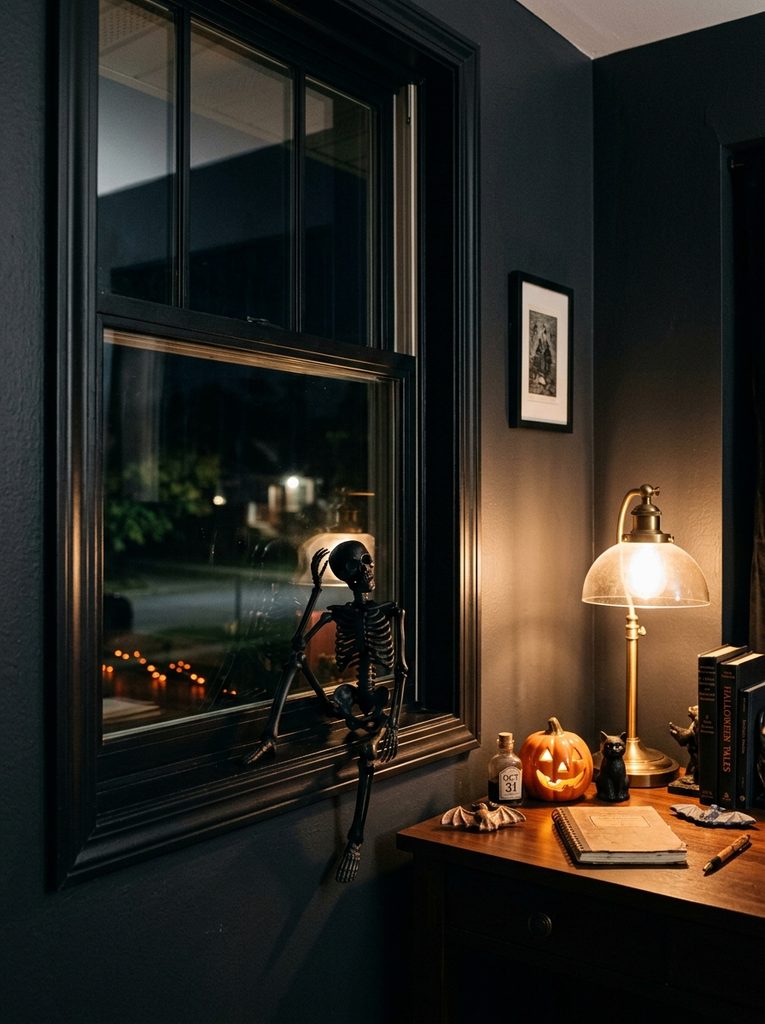
Short Decor Introduction
A seated skeleton creates the amusing illusion that someone—or something—is hanging out inside the window. Rather than filling the entire glass, this design uses one recognizable figure and plenty of negative space. It suits home offices, upstairs windows, and rooms with a slightly darker color palette.
How to Get the Look
- Select a skeleton profile that can be recognized clearly from the street.
- Position the figure so its lower body appears to rest naturally near the bottom of the window.
- Use a desk lamp or warm room lighting behind it to create contrast.
- Add a simple chair or desk inside the room if those pieces already exist.
- Keep the silhouette slightly oversized compared with ordinary wall art.
- Add one small prop, such as a paper cup or pumpkin shape, for a humorous touch.
- Avoid blocking an important window opening if the room depends on it for ventilation or everyday use.
Styling Tips
- Let the skeleton be the joke; don’t surround it with too many competing decorations.
- A slightly slouched pose feels more playful than a perfectly upright figure.
- Warm lighting makes the scene feel inhabited rather than flat.
This idea works particularly well when viewed from the sidewalk because the silhouette creates an unexpected little story inside an otherwise ordinary window.
Moonlit Pumpkin Faces
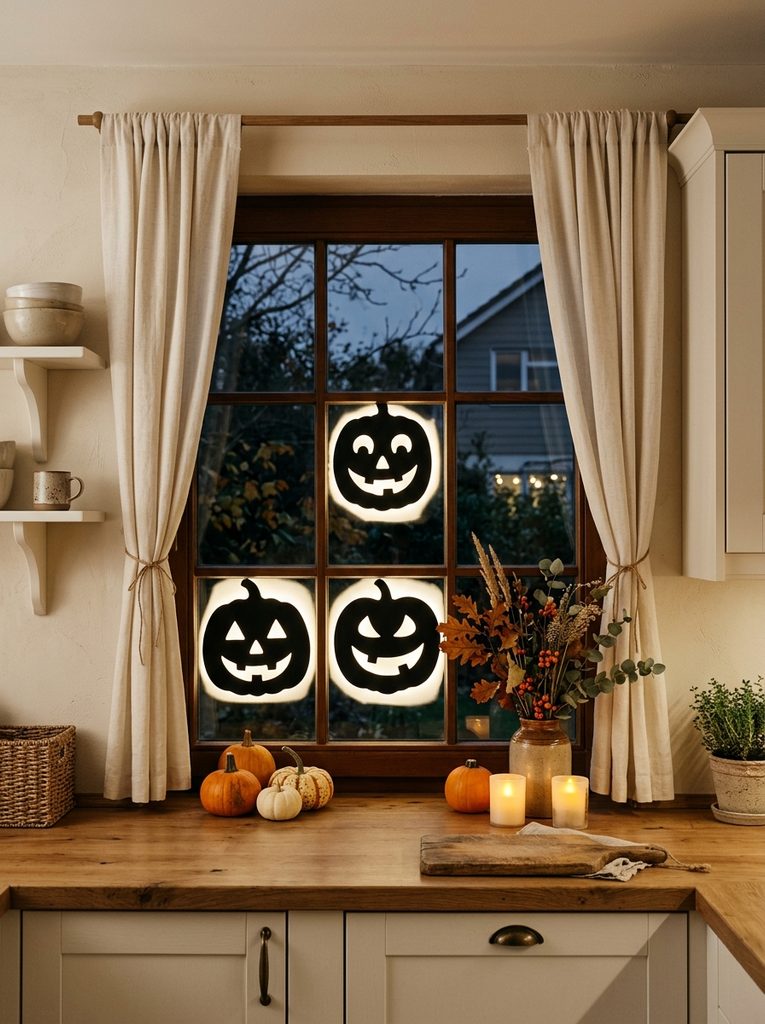
Short Decor Introduction
If you love traditional Halloween colors but want something cleaner than a full orange-and-black display, try a row of jack-o’-lantern faces. The trick is to treat the pumpkin faces as graphic artwork rather than literal pumpkins. Three different expressions can create a playful composition while leaving plenty of open glass around them.
How to Get the Look
- Cut three pumpkin-face silhouettes with distinctly different expressions.
- Use black material so the eyes and mouths appear as strong graphic shapes against the light.
- Arrange the faces at slightly different heights.
- Keep the largest face near the visual center of the window.
- Add real pumpkins along the sill for a layered indoor-outdoor effect.
- Use warm white or amber lighting behind the glass.
- Repeat one pumpkin color elsewhere in the room for visual continuity.
Styling Tips
- Mix friendly, surprised, and mischievous expressions rather than making every face frightening.
- Avoid covering the entire window with orange decorations; the open glass helps the silhouettes stand out.
- Natural wood, cream textiles, and dried foliage make the display feel more sophisticated.
A kitchen window is especially good for this idea because pumpkins and autumn stems already feel natural in the space, making the Halloween accents look intentional rather than temporary clutter.
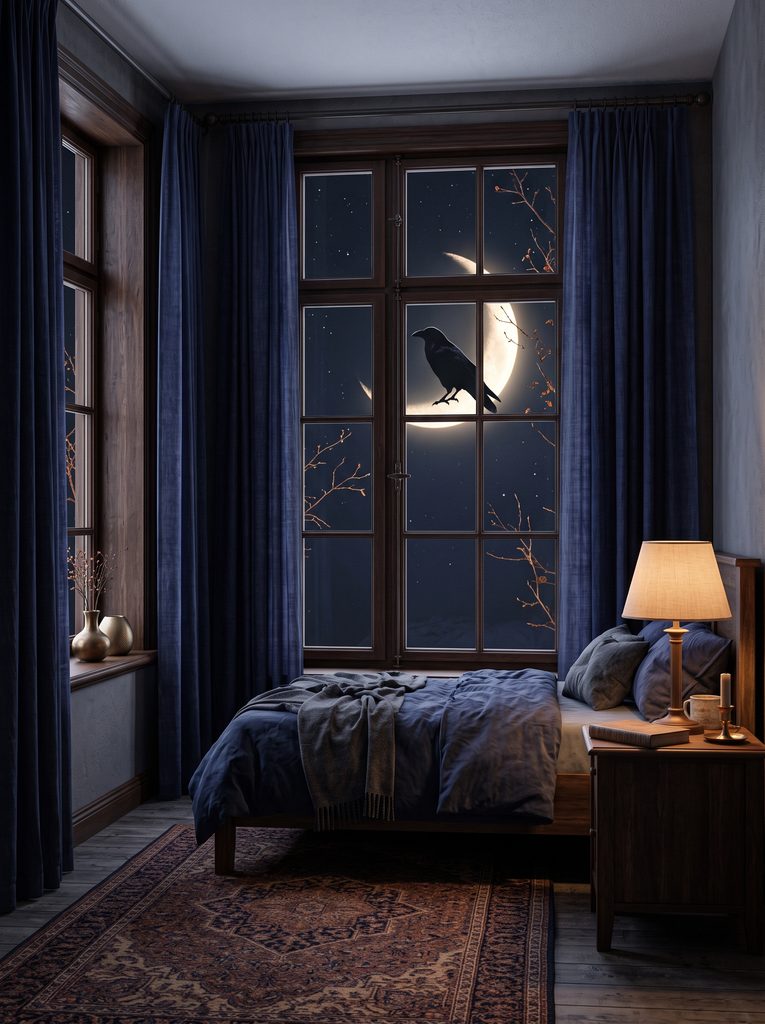
Raven and Crescent Moon
Short Decor Introduction
For a moodier Halloween look, a raven perched against a crescent moon feels mysterious without becoming overly frightening. The limited palette of black, indigo, warm gold, and natural wood works particularly well with traditional or modern interiors. It’s a good choice when you want seasonal decor that feels atmospheric enough to complement the room after Halloween.
How to Get the Look
- Use a recognizable raven side profile with a defined beak and feathered outline.
- Place a crescent moon behind or beside the bird.
- Choose dark charcoal, black, or deep navy materials for the silhouettes.
- Use warm lighting behind the window to create a soft golden contrast.
- Frame the window with dark curtains if the room already has them.
- Add a small arrangement of bare branches nearby for an understated seasonal accent.
- Keep the rest of the room relatively calm so the window remains the focal point.
Styling Tips
- Deep navy can soften an all-black Halloween palette.
- Repeat one warm metallic or wood tone elsewhere in the room to balance the dark silhouettes.
- Keep the moon relatively simple so the raven remains the strongest shape.
Design insight: Seasonal decorating doesn’t have to mean bright orange everywhere. A restrained palette can make Halloween decor feel more integrated with an existing bedroom or living space.
Quick Comparison: Which Silhouette Fits Your Space?
| Idea | Best Window | Overall Mood |
|---|---|---|
| Ghostly Family | Bedroom or dining room | Playful |
| Haunted House | Wide picture window | Spooky |
| Spider & Web | Small window | Modern eerie |
| Skeleton Portrait | Office or upstairs window | Humorous |
| Pumpkin Faces | Kitchen window | Classic Halloween |
| Raven & Moon | Bedroom or living room | Moody |
These nine designs give you plenty of room to mix personalities—from cheerful ghosts and pumpkin faces to a more mysterious raven scene. If you’re decorating several windows, consider choosing one playful design, one classic Halloween motif, and one moodier silhouette rather than repeating the same image throughout the house. That small change can make the exterior feel collected and intentional.

Indy Santos is a passionate interior styling specialist and home living enthusiast with a focus on contemporary decor, smart space planning, and affordable design inspiration. At Inspired Homex, she provides readers with fresh decorating concepts, actionable advice, and professional guidance to create comfortable, elegant, and well-organized homes that reflect their personal style.